Introduction
Understanding Sac Dep Blackheads
Have you ever noticed small, dark plugs appearing on your skin, often around your nose or chin, and wondered what they were? If so, you’ve likely encountered sac dep blackheads. These pesky little intruders can be a frustrating part of skincare, but understanding them is the first step in managing and eliminating them effectively.
What Are Sac Dep Blackheads?
Sac dep blackheads are essentially clogged hair follicles. They form when excess oil, dead skin cells, and bacteria accumulate in your pores. When this gunk is exposed to air, it oxidizes and turns black, giving you that characteristic appearance associated with blackheads. Unlike other types of acne, blackheads don’t lead to inflammation, but they can certainly detract from your skin’s appearance.
Common Causes of Blackheads
Understanding the common causes of sac dep blackheads can help you adjust your skincare routine accordingly. Here are some of the primary culprits:
- Excess Oil Production: If your skin tends to be on the oily side, you're more prone to blackheads. Hormonal changes, especially during puberty or menstrual cycles, can trigger oil production.
- Dead Skin Cells: Your skin regenerates constantly, and sometimes, those dead skin cells don’t shed properly. Instead, they get trapped in your pores.
- Cosmetic Products: Some heavy makeup products or skincare items can clog pores. Always check for non-comedogenic labels if you're prone to blackheads.
- Poor Cleansing Routine: Skipping regular cleansing can lead to a buildup of impurities and oil, making blackheads more likely to appear.
Personal Experience: The Struggle with Blackheads
I remember my early teens, staring in the mirror and being horrified at the sight of blackheads creeping across my nose. No matter how much I scrubbed my face, they seemed to multiply. It wasn’t until I learned about the causes and treatment methods that I managed to tackle the problem effectively. Researching and implementing a solid skincare routine made a world of difference. Now, when faced with the occasional blackhead, I approach the situation armed with knowledge rather than panic.
Identifying Sac Dep Blackheads
Often confused with other forms of acne, sac dep blackheads can usually be identified by their distinct dark appearance. Here’s a quick checklist to distinguish between blackheads and other blemishes:
- Color: Blackheads are dark in color due to oxidation, while whiteheads are typically flesh-toned.
- Texture: Blackheads feel firm and can be squeezed gently with little resistance, while other acne types may be inflamed or swollen.
- Location: Commonly appear on the nose, chin, and forehead—areas known as the T-zone.
Quick Tips for Managing Blackheads
If you're tired of battling sac dep blackheads, here are some effective strategies to help you manage them:
- Exfoliate Regularly: Use gentle exfoliators to help remove dead skin cells without irritating your skin.
- Stay Hydrated: Drinking plenty of water can improve your skin's overall health and balance oil production.
- Consider Salicylic Acid Products: This beta hydroxy acid penetrates the skin effectively, helping to dissolve the debris in your pores.
- Seek Professional Help: If you’re struggling with persistent blackheads, consider visiting a dermatologist for professional extraction or treatments.
The Path Forward
Now that you have a better understanding of sac dep blackheads, you're equipped to tackle the problem head-on. By recognizing what they are, knowing the underlying causes, and utilizing effective strategies, you’ll be one step closer to achieving clearer skin. Together, let’s explore how to prepare your skin for extraction and address those stubborn blackheads in the next section. Your journey to clearer skin begins now!

Preparing Your Skin for Extraction
Proper Cleansing Techniques
Once you’ve gained a solid understanding of sac dep blackheads and how they form, the next vital step is preparing your skin for extraction. This phase is crucial, as taking the time to cleanse properly can significantly enhance your results and minimize the risk of irritation or infection. Let’s dive into effective cleansing techniques that ensure your skin is ready for extraction.
Why Cleansing is Important
Before diving into the techniques, it’s worth noting why cleansing is such a critical step. A clean face helps to:
- Remove Impurities: Dirt, oil, and makeup residue can clog pores further, complicating the extraction process. A clean canvas is essential.
- Prepare the Skin: Cleansing softens the skin and opens up the pores, making it easier to extract the blackheads without excessive pressure.
- Lower Infection Risk: A clean surface minimizes the chance of introducing bacteria during extraction, reducing the likelihood of post-extraction breaksouts.
Step-by-Step Cleansing Techniques
Let’s break down effective cleansing techniques that you can easily incorporate into your skincare routine:
Step 1: Gather Your Supplies
Before starting, make sure you have the following supplies on hand:
- A gentle facial cleanser (preferably one that’s alcohol-free)
- Warm water
- Soft towel or reusable cotton pads
- Optional: exfoliating scrub or a mild chemical exfoliant
This small list ensures that you're well-prepared for the cleansing process. Your face will thank you!
Step 2: Wash Your Hands
This step may seem trivial, but it’s crucial. Washing your hands removes dirt and bacteria that can transfer to your face. Here’s how to wash your hands effectively:
- Use warm water and soap.
- Scrub for at least 20 seconds, focusing on between fingers and under nails.
- Rinse and dry with a clean towel.
Step 3: Wet Your Face
Using warm water, wet your face gently. Warm water helps to open up the pores while also feeling refreshing. Avoid hot water as it can dry out your skin.
Step 4: Apply Cleanser
Choose a gentle, non-comedogenic cleanser. If possible, opt for one that contains salicylic acid, as it can help clear out the pores:
- How to Apply:
- Pump a small amount of cleanser into your hands.
- Gently massage the cleanser onto your face using circular motions.
- Pay special attention to areas with blackheads like the nose and chin.
Step 5: Rinse Thoroughly
Make sure to rinse your face with warm water until the cleanser is completely removed. This step is essential—any left-over product can lead to clogged pores.
Optional Step: Exfoliation
If you’re performing this cleansing routine a few times a week, consider adding a gentle exfoliation step to remove dead skin. Here’s how:
- Choose Your Exfoliant: Select a physical (scrub) or chemical (like glycolic acid) exfoliant that suits your skin type.
- Limit Frequency: Aim to exfoliate only 1-3 times a week to avoid irritation.
Final Touch
Once you’ve rinsed and patted your skin dry with a clean towel, you’re now ready for the next steps in the extraction process. A good cleansing routine not only prepares your skin, but it also promotes overall skin health, giving you a glow that any blackhead remover would envy.
How I Improved My Routine
I recall my early days when I would overlook proper cleansing before an extraction. It led to red and irritated skin after every session. After learning the right techniques and sticking to a dedicated routine, I noticed significantly less irritation and clearer skin after extractions. Following these steps will help you achieve similar results, allowing you to approach blackhead extraction with confidence.
Conclusion
Preparing your skin through proper cleansing techniques can make a world of difference in your skincare routine. Not only does it optimize the extraction process, but it also enhances the health and appearance of your skin. With clean skin, you're ready to take on the subsequent steps of softening those stubborn blackheads to ensure everything goes smoothly. Let’s move forward into that next phase to tackle those blackheads effectively!

Softening the Blackheads
Steam Treatment
Now that your skin is thoroughly cleansed and prepped for extraction, it’s time to take the next important step: softening those stubborn blackheads. One of the most effective and straightforward methods to accomplish this is through a steam treatment. Using steam not only helps loosen the debris trapped in your pores but also enhances blood circulation, leading to a healthier complexion overall.
Why Steam Works Wonders
Steam treatments have been used for centuries in various skincare routines. So, what makes it such a powerful ally in blackhead extraction? Here are some of the benefits:
- Opens Pores: The heat from the steam helps open up your pores, which can make the extraction process much easier.
- Softens the Skin: By warming the skin’s surface, steam loosens blackheads and allows for a gentler extraction with less pressure.
- Cleanses Impurities: Steam enhances sweat production, which works to draw out toxins and impurities from your skin.
How to Perform a Steam Treatment
Ready to give it a try? Here’s a step-by-step guide to performing a steam treatment safely and effectively:
Step 1: Prepare Your Workspace
Before you get started, create a soothing environment. Gather your supplies:
- A large bowl or pot
- Water
- A towel
- Optional: Herbal tea or essential oils (like lavender or eucalyptus) for added relaxation and aroma
Step 2: Boil Water
Begin by boiling water in a pot. Once it reaches a rolling boil, carefully remove it from the heat source. If you’re using a microwave, heat water in a safe container for about 3-4 minutes until steaming.
Step 3: Create Your Steam Bath
For the steaming process:
- Pour the hot water into a large bowl (or keep it in the pot if you prefer).
- Allow it to cool for a minute to avoid scalding yourself; the water should be hot, but comfortable.
- If you’re using essential oils, add a few drops to the water. Not only does this provide added benefits, but it also brings a pleasant aroma to your steam session.
Step 4: Position Yourself Safely
Now it's time to enjoy the steam:
- Create a Tent: Lean over the bowl while placing a towel over your head to trap the steam. Make sure to position your face about 12 inches above the water to avoid burns.
- Set a Timer: Aim to steam for about 5 to 10 minutes. You may find the treatment incredibly relaxing, but it’s important not to overdo it.
Step 5: Pat Your Skin Dry
After your steam treatment, gently pat your face dry with a clean towel. Your skin should feel warm and more pliable, making it ideally prepped for the next step—extraction!
Personal Anecdote: My First Steam Experience
I’ll never forget my first steam treatment. I set everything up, feeling highly optimistic. As I leaned over the steaming bowl, relaxation soon turned to a frantic dash for the towel when I misjudged the distance. I learned two things that day: be cautious with the heat and take my time. Steam treatments can be immensely beneficial, but they should be approached safely!
Follow-Up Care
After steaming, your skin will be primed for extraction, but it’s essential to follow up with proper care:
- Gentle Extraction: When extracting blackheads, ensure you have clean hands or use a blackhead tool specifically designed for this process. This will minimize irritation and the risk of infection.
- Hydrate: After extraction, apply a soothing toner or a gentle hydrating serum to calm your skin. Opt for products with witch hazel or rosewater for their soothing properties.
- Avoid Heavy Makeup: Post-treatment, try to avoid applying heavy makeup to allow your skin to breathe and recover from the extraction.
Conclusion
Incorporating steam treatments into your blackhead-removal routine can significantly enhance your results while making the process more enjoyable. The warmth and relaxation that come with steaming prepare your skin perfectly for extraction, reducing the risks involved and promoting a healthier complexion. With your skin now ready, let's move on to the next essential step—gentle extraction methods—to bid farewell to those pesky blackheads for good!

Gentle Extraction Methods
Using a Blackhead Remover Tool
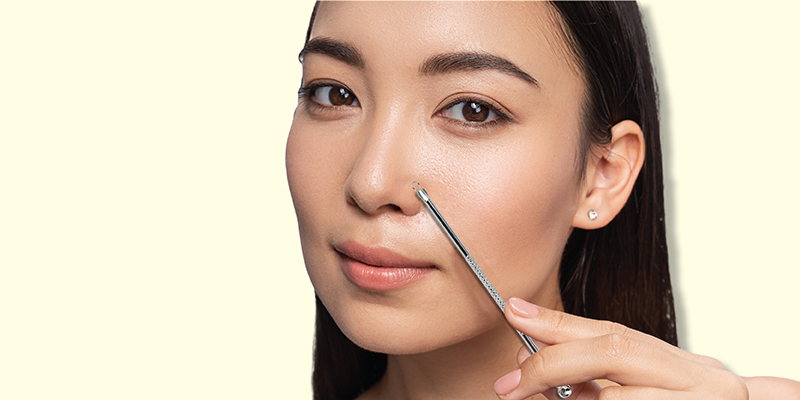
With your skin thoroughly cleansed and softened through steam treatment, you are now ready for one of the most satisfying parts of the blackhead removal process: extraction. Using a blackhead remover tool can be an effective and gentle way to clear those blockages from your pores without causing unnecessary damage to your skin. Let’s delve into how to use these tools properly for the best results.
Understanding Blackhead Remover Tools
Before jumping into the extraction process, it's important to know what type of tool you're using. There are various designs, but generally, blackhead remover tools feature a loop or a spoon-like end. Here’s a quick overview:
- Stainless Steel: A good quality blackhead remover tool is typically made of stainless steel, making it easy to sterilize.
- Loop Size: Various loop sizes are available; a smaller one is best for delicate areas, while a larger loop can effectively deal with blackheads on broader parts of your face, like the forehead.
- Dual-Ended Tools: Some tools feature a loop on one end and a pointed extractor on the other. While the loop is ideal for pushing material out, the pointed end is designed for extracting whiteheads or deeper blockages.
Safety First: Preparing Your Tool
Before using a blackhead remover tool, it’s essential to ensure that it is clean to avoid introducing bacteria into your skin. Here’s how to prepare:
- Sterilization: Boil the tool in water for a few minutes or wipe it down with rubbing alcohol.
- Check for Damage: Inspect the tool to ensure there are no sharp edges or breaks that could harm your skin.
Step-by-Step Process for Gentle Extraction
Now that you’ve prepared your tool, let’s walk through the steps you should follow for a successful extraction:
Step 1: Positioning
- Comfort is Key: Find a comfortable position in front of a well-lit mirror. Good lighting will allow you to see what you’re doing clearly.
- Skin Tightening: With a clean hand, gently stretch the skin taut around the blackhead to make it easier to extract.
Step 2: Using the Tool
Now, let’s get into the application:
- Select the Loop: Choose the appropriate size loop based on your blackhead’s location.
- Press Gently: Position the loop directly over the blackhead and apply gentle pressure downward. You should feel a slight pop as the clogged material begins to release. If it doesn’t come out easily, stop and give it a little more time. Forcing it can lead to skin irritation or even scarring.
- Follow Up with the Pointed End (if necessary): If some material remains after using the loop, you can gently use the pointed end to coax it out.
Step 3: After Extraction Care
Once you’ve successfully extracted the blackhead:
- Clean the Area: Use a gentle cleanser or an antiseptic wipe to clean the area you just worked on.
- Apply Toner: A soothing toner can help to minimize any redness or inflammation.
- Hydrate and Care: Finish your routine with a light moisturizer, ensuring your skin is properly hydrated.
Personal Experience: Tools and Tips
When I first ventured into using a blackhead remover tool, I remember feeling apprehensive. The last thing I wanted was to irritate my skin further! After some trial and error, I discovered that patience was key. One of my favorite techniques is to extract blackheads after a shower when my pores are open, making the process much smoother.
Common Mistakes to Avoid
To get the best out of your extraction with a blackhead remover tool, here are some common pitfalls to avoid:
- Using Excessive Force: Avoid pressing too hard; this can cause bruising or skin damage.
- Ignoring Aftercare: Always follow up with soothing products to help your skin recover.
- Extracting Infected Areas: If a blackhead appears red or inflamed, it's best to let it heal rather than risk making it worse.
Conclusion
Using a blackhead remover tool can be a precise and effective way to deal with stubborn blackheads, especially when used correctly. By ensuring that your tool is clean and following a gentle extraction technique, you can enjoy a clearer and healthier complexion with minimal irritation. Having gone through this process, you might feel more confident in your abilities to cleanse and care for your skin. Now that those pesky blackheads are managed, it's essential to focus on soothing and healing your skin afterward to maintain its health and glow! Let’s explore how to achieve that in the following section.

Soothing and Healing the Skin After Removal
With your blackheads successfully extracted, it’s essential to take a moment to care for your skin. Post-extraction, your skin may be a little irritated or sensitive, so focusing on soothing and healing is crucial to ensuring it looks its best. Let’s dive into effective methods to help your skin recover beautifully.
Understanding Post-Extraction Care
After extraction, your skin is vulnerable. It may feel tender and look slightly red due to the pressure applied during the process. The following steps will help soothe irritation and reduce inflammation:
- Minimize Inflammation: Calm your skin to prevent excessive redness and swelling.
- Promote Healing: Encourage faster recovery by using products designed to repair and hydrate your skin.
- Create a Protective Barrier: Guard against bacteria that may lead to breakouts or infections following extraction.
Steps for Soothing Your Skin
Here’s a concise guide for effectively soothing your skin after blackhead removal:
Step 1: Cleanse Gently
After the extraction process, it's important to cleanse the area again to remove any remaining debris or oils. Consider using:
- A Gentle Cleanser: Opt for a sulfate-free formula that won’t strip your skin of its natural oils.
- Avoid Exfoliation: For the next few days, skip any physical or abrasive exfoliants, as your skin needs time to recover.
Step 2: Apply a Soothing Toner
Using a soothing toner can help rebalance your skin’s pH and calm any irritation. Look for toners that include:
- Aloe Vera: Known for its soothing properties, aloe vera helps in reducing redness and moisturizing the skin.
- Chamomile or Green Tea Extract: Both are excellent for their anti-inflammatory benefits and can help calm irritated skin.
To apply, soak a cotton pad with your chosen toner and gently sweep it over the affected areas, avoiding any aggressive rubbing.
Step 3: Use a Healing Serum
Applying a healing serum focused on repair can significantly enhance recovery. Here are some ingredients to look for:
- Niacinamide: This powerhouse ingredient helps improve the skin's barrier, reducing redness and irritation.
- Hyaluronic Acid: Acts as a moisture magnet, deeply hydrating the skin, which is vital after extraction.
- Application Tip: Use a few drops of your serum and gently press it into your clean, damp skin to lock in hydration.
Step 4: Moisturize
Once your toner and serum are absorbed, follow up with a gentle moisturizer. Opt for one that is:
- Non-comedogenic: This ensures it won’t clog your pores, further aggravating the situation.
- Fragrance-free: Avoid excessive irritation by steering clear of strong fragrances.
Step 5: Protect Your Skin
- Sunscreen: If you plan to be outdoors, apply a broad-spectrum sunscreen with at least SPF 30. Freshly extracted skin is more susceptible to sun damage.
- Avoid Heavy Makeup: Give your skin a break from heavy cosmetics for at least 24 hours post-extraction.
Personal Experience: My Healing Routine
After my first experience with blackhead extraction, I learned the importance of post-care the hard way. Excited to see clear skin, I immediately applied makeup without giving my skin time to breathe. The result? A breakout that took longer to clear than the blackheads did. Now, I prioritize soothing and healing rituals after each extraction. A calming mask or a lightweight moisturizer has become a staple in my post-care routine, and it’s made a visible difference!
Additional Tips for Long-Term Skin Health
To maintain healthy skin and prevent future blackheads, consider these long-term strategies:
- Stay Hydrated: Drink plenty of water daily to keep your skin hydrated from within.
- Balanced Diet: Incorporate foods rich in antioxidants, vitamins, and minerals to support skin health.
- Consistent Skincare Routine: Stick to a routine that includes cleansing, exfoliating, and moisturizing regularly.
Conclusion
Soothing and healing your skin after blackhead removal is vital for promoting a healthy complexion and preventing further issues. By following these post-care steps, you’ll not only enhance your skin’s recovery but also help maintain its overall health in the long run. Remember to listen to your skin, giving it the care it needs to flourish. With a little patience and the right routine, you’ll be on your way to beautiful, clear skin in no time!